I love to hook a great landscape. To me it is as if I am painting with wool. I was never a great painter and the use of wool that can be pulled out and changed is the perfect medium for me. A landscape can be as easy or hard as you want to make it.
The easiest way is just to hook the picture without much thought given to the issue of light. This is a perfectly good way to hook a landscape. I have absolutely enjoyed hooking this way and a rug comes out beautiful. You do not need me to read any further if you like to hook this way just trust your instincts and hook away.
If you do want to delve a little deeper, I want to discuss the use of light to increase complexity into your art. The things to consider are where are you standing if you were in the picture, what time of day is it, what time of year is it and finally where is the light coming from? If you can take a few moments and ponder those questions. You will have a successful picture.
Most patterns will make the decision of where you might find yourself standing easy, as that is the perception of the artist, who designed the pattern. You see the landscape as from where the artist is standing. If you are designing our own pattern think about the light as you design.
Where is the light coming from? Is it behind you? If the light is at your back the brightest images will be all the front angles of the objects. Is the light hitting you in the face, in front of you? The lighter images are more complicated now. Where would the light show through and where would images be in shadow? Coming over the back of the images? Or is the light from the side? There is a shine from that side of all images. Once you decide the direction do not be afraid to draw lines on the pattern showing the origin of the light to remind yourself as you hook.
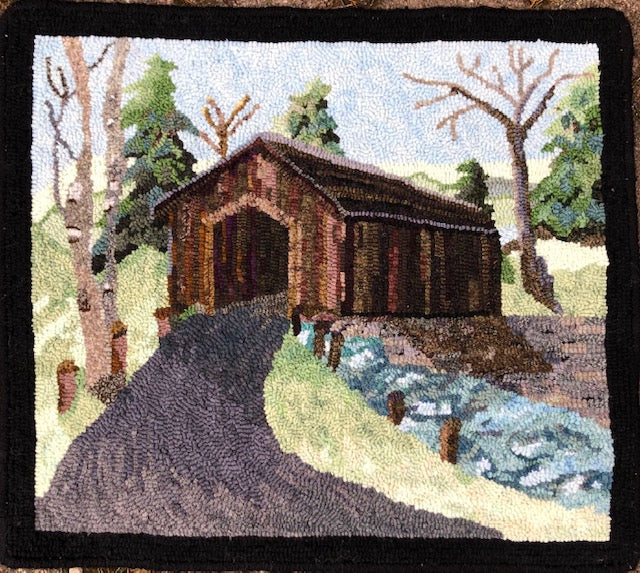
I am using the image of a covered bridge and will show you the different ways in which the light would impact the bridge.
I am using the image of a covered bridge and will show you the different ways in which the light would impact the bridge.
Light from the Front of the Bridge

I am standing right in front of the bridge. The light is behind me. So the light would not show on the back side of the roof. Every other angle of the bridge would have some light. The front corner would have the most light and then it would scan out darker in both left and right. The front of the trees will be lighter than the sides. Think everything being lighter from front to back.

In this photo the light is still coming from the front of the bridge,but I am standing to the left side.I am standing to the left of the bridge. This light would again reflect brightest on the front of the bridge with the archway. The trees would be brightest on the left side and then scan darker left to right of the picture. Unless there is an image not shadowed by something in the picture. Say the top of the back tree.
Light from the Right Side

I am standing to the right of the bridge. The light is coming from the right. This light would reflect against the side of the bridge with the front being in shadow. The water would be brightest on the right and the images would again get darker from right to left.
Backlighting

Here is the light source I used. I am standing in front of the bridge however the light is coming from the back. The covered bridge is in the shadows. The light would reflect behind the bridge not in front. The light scans from back to front. You have to think 3-D for this light source more than the other options given. This is "Babb's Bridge" designed by Jackye Hansen. It is in the Landscapes and Seascapes pattern collection. Or just search it on the website search.

Now it is your turn. Go back and look at your pattern. Go through the same process as I described but think in three dimensions; height, length, and width. Draw in shadowing and make notes so you can go back and hook without rethinking the process.
The most important part of hooking a piece is to take the time to “see” the picture before you hook. That is the hardest part. You do not have to have the complete rug planned, but you do need to know where you are going with it. If there is a tree or path you can’t “see” do not worry it will come to you as you hook. Also remember that if you don’t like it you can always change it. As I said at the beginning, I am no painter but with the versatility of wool I can be an artist. You can too!
Laura Kenyon